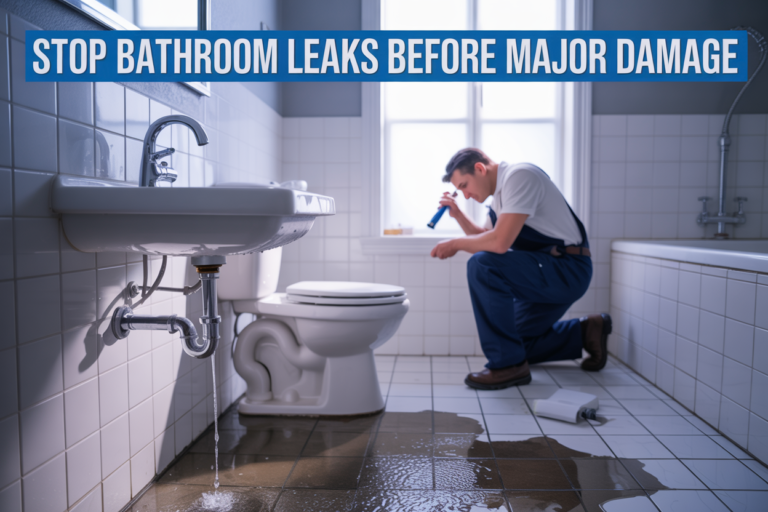
Nothing ruins my morning routine like stepping into a puddle of water on my bathroom floor. If you’re a homeowner dealing with mysterious wet spots, dripping sounds, or that musty smell that won’t go away, you’re probably facing bathroom water leakage issues that need immediate attention.
I’ve learned the hard way that what starts as a small drip can quickly turn into thousands of dollars in water damage, mold problems, and structural repairs. That’s why I want to share what I’ve discovered about tackling these issues before they spiral out of control.
In this guide, I’ll walk you through identifying the sneaky sources where leaks commonly hide in bathrooms, from loose toilet seals to worn-out shower caulking. I’ll also cover the warning signs I wish I had recognized earlier, plus practical DIY fixes you can try yourself for minor problems. When these solutions aren’t enough, I’ll explain when it’s time to call in the pros – and how finding the best waterproof solution through experts like Sumukha Constructions & Designs can save you from costly repairs down the road.
Whether you’re dealing with your first leak or want to prevent future problems, my goal is to help you protect your home and your wallet from water damage disasters.
Identify the Most Common Bathroom Water Leakage Sources
Faulty Toilet Seals and Worn Wax Rings
After years of dealing with bathroom water damage cases, I’ve seen how toilet seals and wax rings become silent destroyers of bathroom floors. The wax ring that sits between your toilet and the floor drain becomes my biggest concern when homeowners ignore the early signs.
I notice that wax rings typically fail after 20-30 years, but in busy households, this timeframe shrinks dramatically. The constant pressure from sitting, combined with temperature fluctuations, causes the wax to crack and lose its seal. When I inspect damaged bathrooms, I often find that water has been seeping through this compromised seal for months or even years.
My experience shows that loose toilet bolts accelerate wax ring failure. Every time someone sits down, the toilet rocks slightly, breaking the seal bit by bit. I’ve learned to check for this rocking motion during my inspections because it’s a dead giveaway that water damage is already happening beneath the surface.
The damage I’ve witnessed from faulty toilet seals includes rotted subfloors, damaged ceiling joists in rooms below, and mold growth that spreads throughout the house. I remember one case where the homeowner ignored a slight toilet wobble for two years, only to discover that the entire bathroom floor needed replacement.
Cracked or Damaged Shower and Bathtub Grout
Grout problems keep me busy because homeowners often view them as cosmetic issues rather than structural threats. I’ve pulled back shower walls to find extensive water damage that started with hairline cracks in grout lines that seemed insignificant at first glance.
My observations reveal that grout typically begins failing around the 5-7 year mark, especially in high-moisture areas like shower corners and tub surrounds. I pay special attention to the grout lines where walls meet the tub or shower pan because these areas experience the most movement and stress.
I’ve noticed that cheaper grout installations fail much faster than quality work. When contractors cut corners on grout mixing or don’t properly clean joints before application, I see failure within 2-3 years. Poor ventilation accelerates this process because constant moisture prevents proper curing and weakens the grout over time.
The water damage I document from failed grout ranges from minor tile loosening to complete wall reconstruction. I’ve seen cases where water traveled through grout cracks, saturated the wall cavity, and caused structural damage to floor joists and wall studs. My most expensive grout-related repair involved replacing an entire bathroom because water had been seeping through compromised grout for over three years.
Leaking Faucets and Showerheads
Dripping faucets and showerheads might seem like minor annoyances, but I treat them as early warning systems for bigger problems. My experience shows that what starts as an occasional drip can quickly escalate into significant water damage when internal components fail completely.
I find that cartridge-style faucets develop leaks when O-rings deteriorate or mineral deposits build up inside the valve body. Single-handle faucets particularly frustrate me because the cartridge can fail internally, allowing water to flow behind the wall without any visible signs at the fixture itself.
Showerhead leaks present unique challenges because homeowners often don’t notice water pooling behind shower walls. I’ve discovered that loose connections at the shower arm frequently cause water to spray into wall cavities rather than through the showerhead. My inspections reveal that this hidden water damage can continue for years before becoming visible.
My repair records show that ignored faucet leaks cost homeowners significantly more than immediate fixes. I’ve seen simple $50 cartridge replacements turn into $3,000 bathroom renovations because water damaged the vanity, flooring, and drywall over time.
Burst or Corroded Pipes Behind Walls
Hidden pipe failures represent my most challenging diagnostic cases because the damage often spreads extensively before becoming visible. I’ve learned that copper pipes typically show corrosion after 15-20 years, while galvanized steel pipes start failing much sooner in areas with hard water.
My investigations reveal that pipes behind shower and bathtub walls face particularly harsh conditions. The combination of temperature fluctuations, moisture, and pressure changes causes joints to loosen and pipe walls to thin. I pay close attention to homes built before 1970 because galvanized pipes from that era almost always need replacement.
I’ve noticed that small pinhole leaks in copper pipes can spray water for months before homeowners notice damage. The mist from these tiny holes saturates insulation, drywall, and wooden framing members. My moisture readings often show extensive damage spreading 4-6 feet from the actual leak source.
When I encounter burst pipes behind walls, the damage typically requires major reconstruction. I’ve overseen projects where single pipe failures led to gutting entire bathrooms and replacing structural elements. My most extensive case involved a burst supply line that ran undetected for weeks, ultimately requiring replacement of floor joists, subflooring, and complete bathroom reconstruction.
For comprehensive waterproofing solutions that address these common leakage sources, I recommend consulting with specialists who understand both the immediate repairs and long-term prevention strategies needed to protect your investment.
Recognize Early Warning Signs Before Major Damage Occurs
Water Stains and Discoloration on Walls and Ceilings
I’ve learned through years of experience that water stains are like silent alarms screaming for attention. When I walk into a bathroom and spot those telltale yellow or brown patches on walls and ceilings, my heart sinks because I know what’s coming next.
These stains typically start small – maybe just a faint discoloration that you might dismiss as lighting tricks. But I’ve watched countless homeowners ignore these early warning signs, only to face massive repair bills later. The stains usually appear as irregular shapes with darker edges, creating that characteristic ring pattern that grows outward over time.
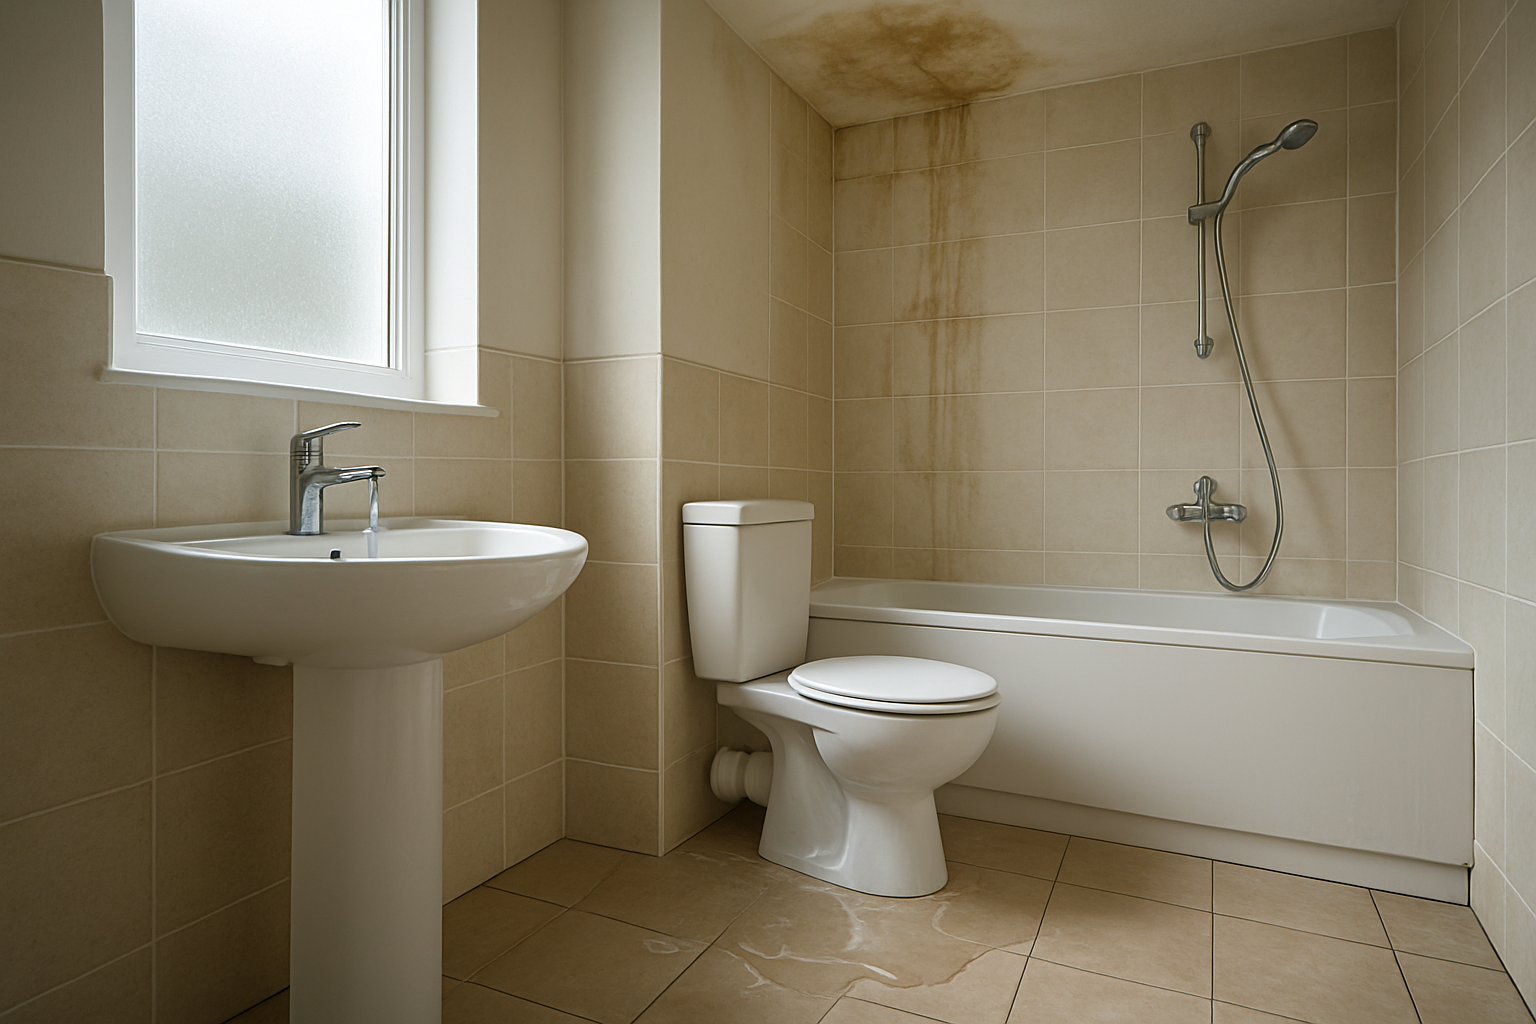
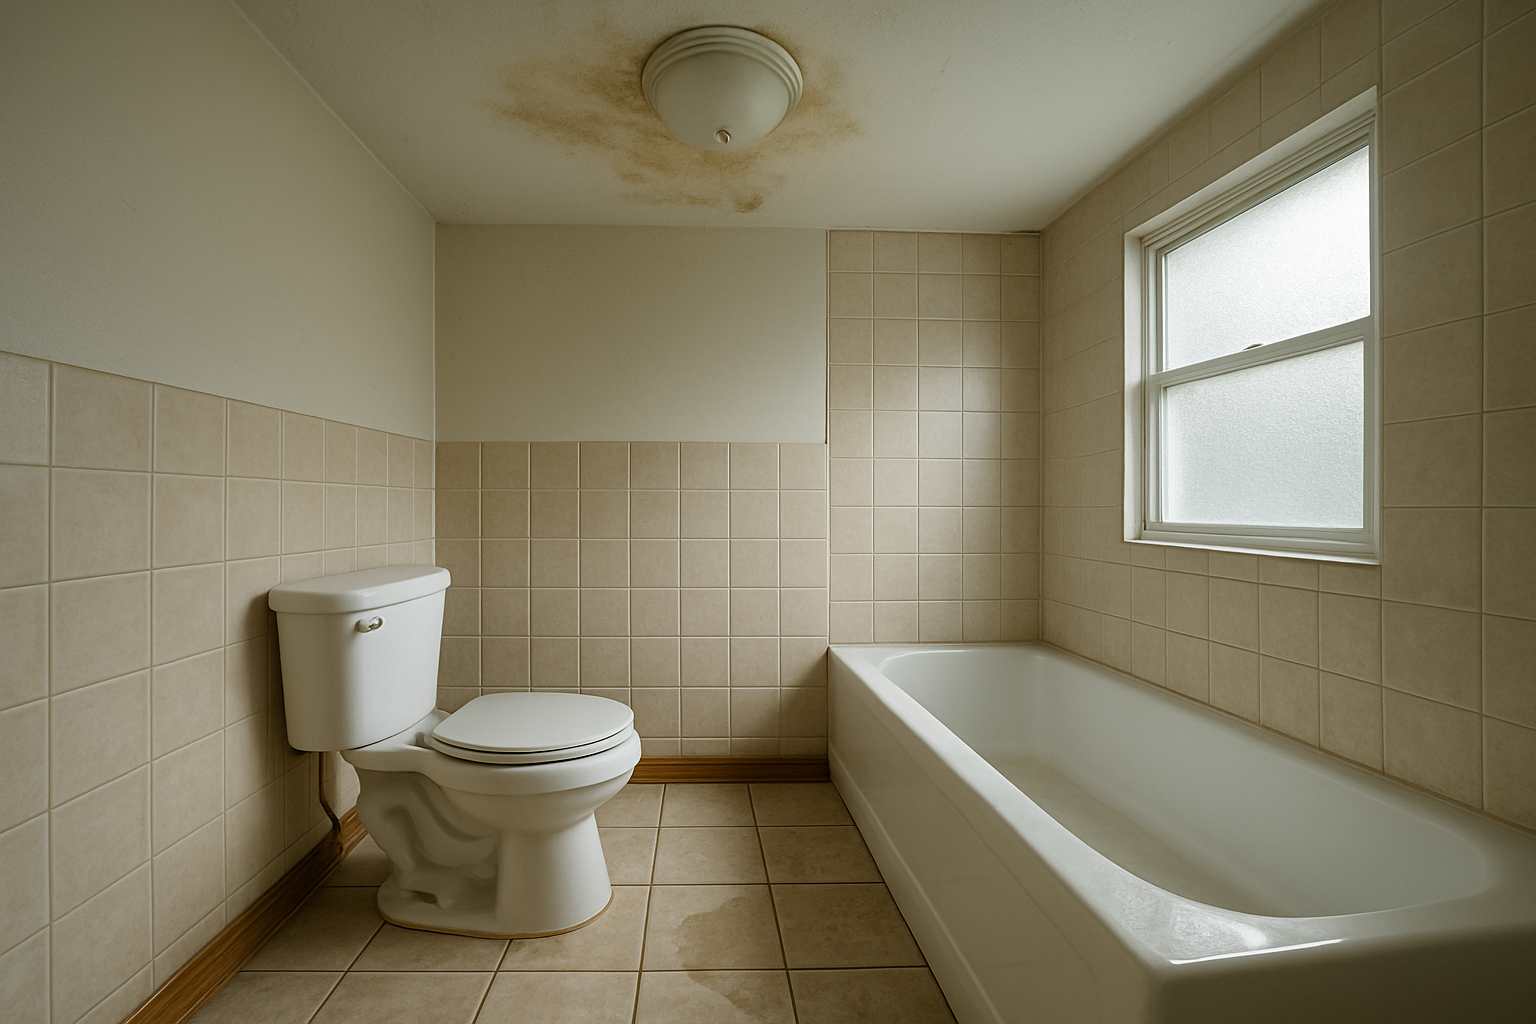
Ceiling stains deserve special attention because they often indicate leaks from the floor above or roof issues. I remember one client who noticed a small brown spot above their shower. They thought it was just condensation buildup, but within three months, that spot had tripled in size and started peeling paint. By the time they called me, water was actually dripping through during heavy rains.
Wall stains near plumbing fixtures are equally concerning. I’ve seen these develop behind toilets, around tub surrounds, and near sink areas. The tricky part is that these stains often appear on the opposite side of the wall where the leak originates, making detection challenging for untrained eyes.
Musty Odors and Increased Humidity Levels
My nose has become my most valuable diagnostic tool over the years. That distinctive musty smell – like old wet newspapers or damp basements – hits me the moment I enter a bathroom with hidden water damage. This odor comes from mold and mildew growth, which thrives in moisture-rich environments created by undetected leaks.
I always tell my clients to trust their noses. If your bathroom smells off, especially after thorough cleaning, there’s likely water accumulating somewhere it shouldn’t be. The smell becomes more pronounced in enclosed spaces and often worsens during humid weather or after hot showers.
Increased humidity levels go hand-in-hand with these odors. I use moisture meters to measure humidity, but you don’t need fancy equipment. If your bathroom mirror stays fogged longer than usual, if towels take forever to dry, or if you notice condensation on walls that weren’t there before, these are red flags waving right in front of you.
I’ve discovered that persistent humidity creates a vicious cycle. The excess moisture encourages more mold growth, which releases more moisture into the air, creating an environment where leaks can hide and multiply. Bathroom exhaust fans working overtime, windows constantly fogging up, and that clammy feeling on your skin all point to moisture problems that need immediate attention.
Warped Flooring and Loose Tiles
Floor problems break my heart because by the time you see them, significant damage has already occurred underneath. I’ve pulled up countless bathroom floors to reveal rotted subfloors, damaged joists, and structural issues that could have been prevented with earlier intervention.
Warped vinyl or laminate flooring shows up as bubbles, curling edges, or sections that feel spongy underfoot. I remember walking into one bathroom where the floor actually bounced when I stepped on it – a clear sign that water had compromised the subflooring beneath.
Tile issues are equally telling. When I see tiles that rock back and forth or hear hollow sounds when tapped, I know water has infiltrated the tile bed. Grout that’s cracking, discolored, or missing entirely creates pathways for water to seep through. I’ve witnessed entire tile installations fail because small grout problems were ignored.
Hardwood floors present their own challenges. Water causes wood to expand, creating gaps, cupping, or crowning effects. I’ve seen beautiful hardwood bathroom floors completely ruined because a small leak behind the toilet went unnoticed for months.
The scary truth is that floor damage often indicates water has been present long enough to affect structural elements below. I always recommend immediate professional assessment when flooring shows these warning signs because the visible damage represents just the tip of the iceberg.
Understand the Costly Consequences of Ignoring Water Leaks
Structural damage to floors and subflooring
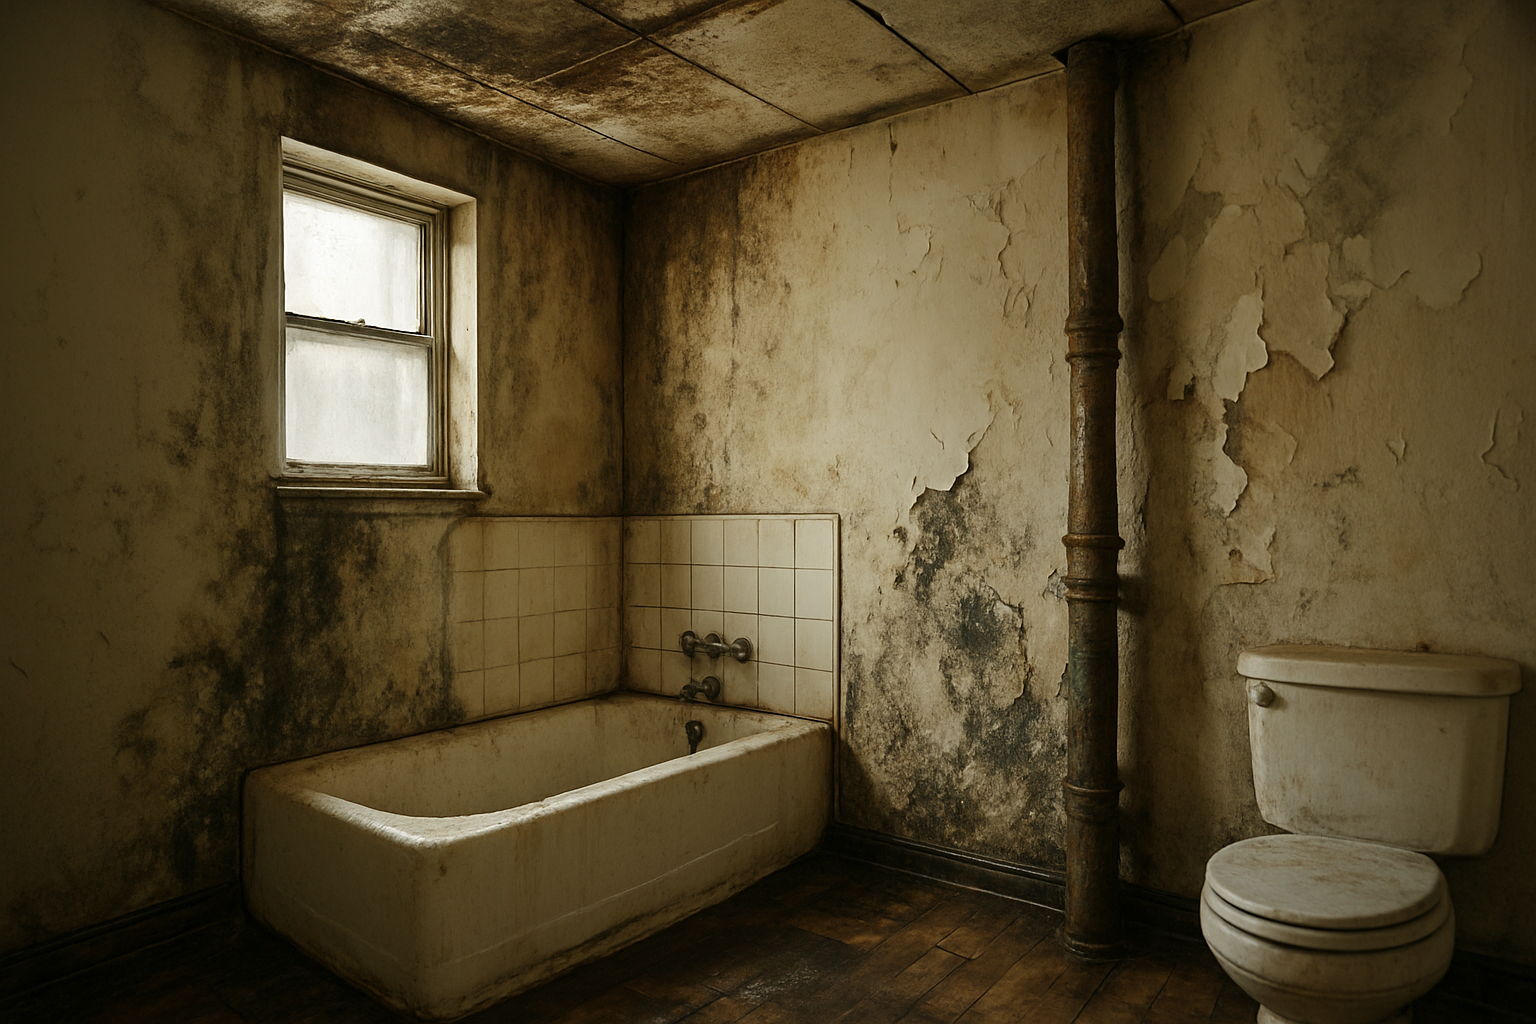
I’ve witnessed countless homeowners discover the hard way that even a small bathroom leak can turn into a structural nightmare. When water seeps through bathroom floors, it doesn’t just stay on the surface – it infiltrates the subflooring, creating a domino effect of destruction that can cost thousands to repair.
My experience has shown me that wooden subflooring is particularly vulnerable. Water causes wood to warp, rot, and lose its structural integrity. I’ve seen bathroom floors that started sagging because moisture weakened the joists underneath. The damage often extends beyond the immediate leak area, spreading to adjacent rooms and requiring extensive reconstruction.
Concrete subflooring isn’t immune either. While it won’t rot like wood, water can cause concrete to crack and weaken over time. I’ve observed situations where persistent leaks led to foundation issues, requiring costly structural repairs that could have been avoided with early intervention.
Mold growth and health hazards
The health implications of ignoring water leaks genuinely concern me. Within 24 to 48 hours of water exposure, mold begins to flourish in the warm, humid environment that bathrooms naturally provide. I’ve seen families forced to relocate temporarily while professionals remediate extensive mold growth that started from a simple toilet base leak.
Black mold is particularly dangerous. I’ve worked with homeowners whose family members developed respiratory issues, allergies, and other health problems directly linked to mold exposure from bathroom leaks. Children and elderly family members are especially susceptible to these health risks.
The remediation process is expensive and disruptive. Professional mold removal can cost anywhere from $500 to $6,000, depending on the extent of contamination. I’ve seen cases where entire bathroom renovations became necessary because mold had spread throughout the walls and flooring materials.
Increased water bills and utility costs
My clients are often shocked when I show them how much money they’re literally watching go down the drain. A single dripping faucet can waste over 3,000 gallons per year. That seemingly minor toilet leak? It can waste up to 200 gallons daily, adding hundreds of dollars to annual water bills.
I track these costs for my clients, and the numbers are staggering:
| Leak Type | Daily Water Waste | Annual Cost Impact |
|---|---|---|
| Dripping faucet | 1-10 gallons | $35-$350 |
| Running toilet | 20-200 gallons | $200-$2,000 |
| Leaky shower head | 10-30 gallons | $100-$300 |
Beyond water costs, I’ve noticed that persistent leaks often lead to increased humidity levels, forcing HVAC systems to work harder. This creates a double financial hit – higher water bills plus increased energy costs.
Property value reduction and insurance complications
Real estate professionals consistently tell me that water damage history significantly impacts property values. Even after repairs, homes with previous water damage typically sell for 10-15% less than comparable properties. I’ve advised clients who discovered that undisclosed water damage could void their home warranty or create legal complications during sales.
Insurance companies are increasingly strict about water damage claims. I’ve seen policies canceled or premiums increased after multiple water damage claims. Some insurers now require regular plumbing inspections for older homes, and they may deny coverage for damage deemed “preventable maintenance issues.”
Documentation becomes critical. I always recommend keeping detailed records of any water issues and repairs. Insurance adjusters scrutinize claims closely, and having proper documentation can mean the difference between coverage and denial. The best waterproof solution involves proactive maintenance and immediate attention to any signs of water intrusion.
Master DIY Solutions for Minor Bathroom Leaks
Replace toilet wax rings and tighten connections
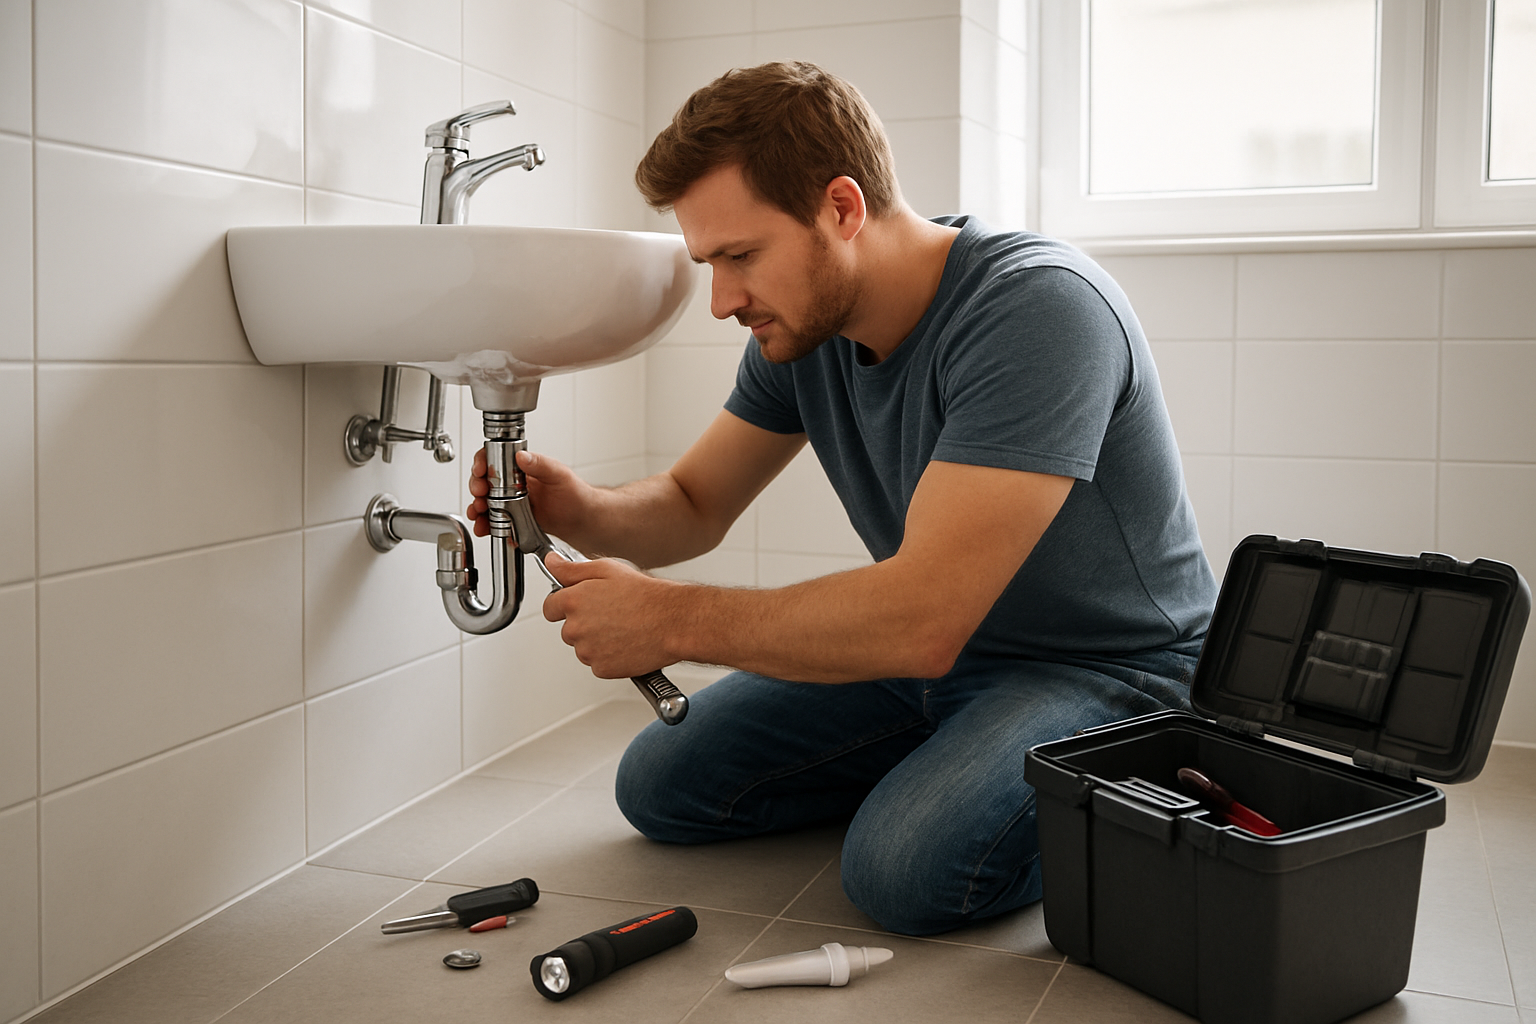
I’ve tackled my fair share of toilet leaks, and I can tell you that replacing a wax ring is one of the most rewarding DIY fixes you’ll ever do. When I notice water pooling around my toilet base or catch that unmistakable sewage smell, I know it’s time to get my hands dirty.
First, I shut off the water supply and drain the toilet completely by flushing and holding the handle down. Then I disconnect the water line and remove the toilet bolts. Here’s where many people get nervous, but I’ve learned that lifting a toilet isn’t as scary as it looks – just bend your knees and get a good grip on both sides.
Once I expose the old wax ring, I scrape off every bit of old wax from both the toilet base and the floor flange. I use a putty knife for this, and I make sure the surface is completely clean. When I install the new wax ring, I center it perfectly on the toilet base – not the floor flange like some tutorials suggest. This way, when I lower the toilet back down, everything aligns properly.
I’ve found that rocking the toilet gently while pressing down helps the wax ring seal completely. Then I tighten the bolts evenly, alternating between them to avoid cracking the porcelain. I never overtighten – snug is enough.
For loose connections, I check all the bolts holding the toilet to the floor and the tank to the bowl. A simple quarter-turn with my wrench usually stops those annoying wobbles and minor leaks.
Recaulk shower and bathtub areas effectively
My bathroom caulking projects used to be disasters until I learned the right technique. Now I approach every recaulking job with confidence, knowing I can create watertight seals that last for years.
I start by removing every trace of old caulk using a caulk removal tool or sharp utility knife. This step takes patience, but I’ve learned that rushing here means poor adhesion later. I clean the area with denatured alcohol to remove soap scum and mildew – something I wish someone had told me years ago.
Before applying new caulk, I run a bead of painter’s tape about 1/8 inch away from where I want my caulk line. This creates clean, professional-looking edges that make me look like I actually know what I’m doing.
I cut my caulk tube at a 45-degree angle, making the opening slightly smaller than the gap I’m filling. When I apply the caulk, I maintain steady pressure while moving at a consistent speed. The key is keeping the gun at the same angle throughout the entire bead.
Here’s my secret weapon: after laying the bead, I dip my finger in soapy water and smooth the caulk in one continuous motion. I remove the tape immediately while the caulk is still wet, and I avoid using the shower for at least 24 hours to let it cure properly.
Fix dripping faucets with simple part replacements
Dripping faucets drive me crazy, but I’ve discovered that most fixes are surprisingly simple once you identify the faucet type. I keep a basic repair kit handy because these issues always seem to happen at the worst times.
For compression faucets (the kind with separate hot and cold handles), I usually need to replace the rubber washers or O-rings. I turn off the water supply, remove the handle, and unscrew the packing nut. The worn washer sits at the bottom of the stem, and I match it exactly at the hardware store.
Single-handle cartridge faucets require a different approach. I remove the handle and retaining clip, then pull out the old cartridge with pliers. Sometimes these cartridges stick, so I use a cartridge puller tool that I bought after struggling with my first repair.
Ball faucets have multiple small parts that wear out. I’ve learned to buy a complete repair kit rather than trying to replace individual pieces. The springs and rubber seats usually need replacing together.
For ceramic disk faucets, I clean the ceramic disks first before assuming they need replacement. Often, mineral buildup causes the dripping, and a good cleaning with white vinegar does the trick.
I always take a photo of the faucet parts before disassembly and bring the old parts to the store for exact matching. This simple step has saved me countless return trips and ensures I get the right components every time.
Know When to Call Professional Plumbers for Complex Issues
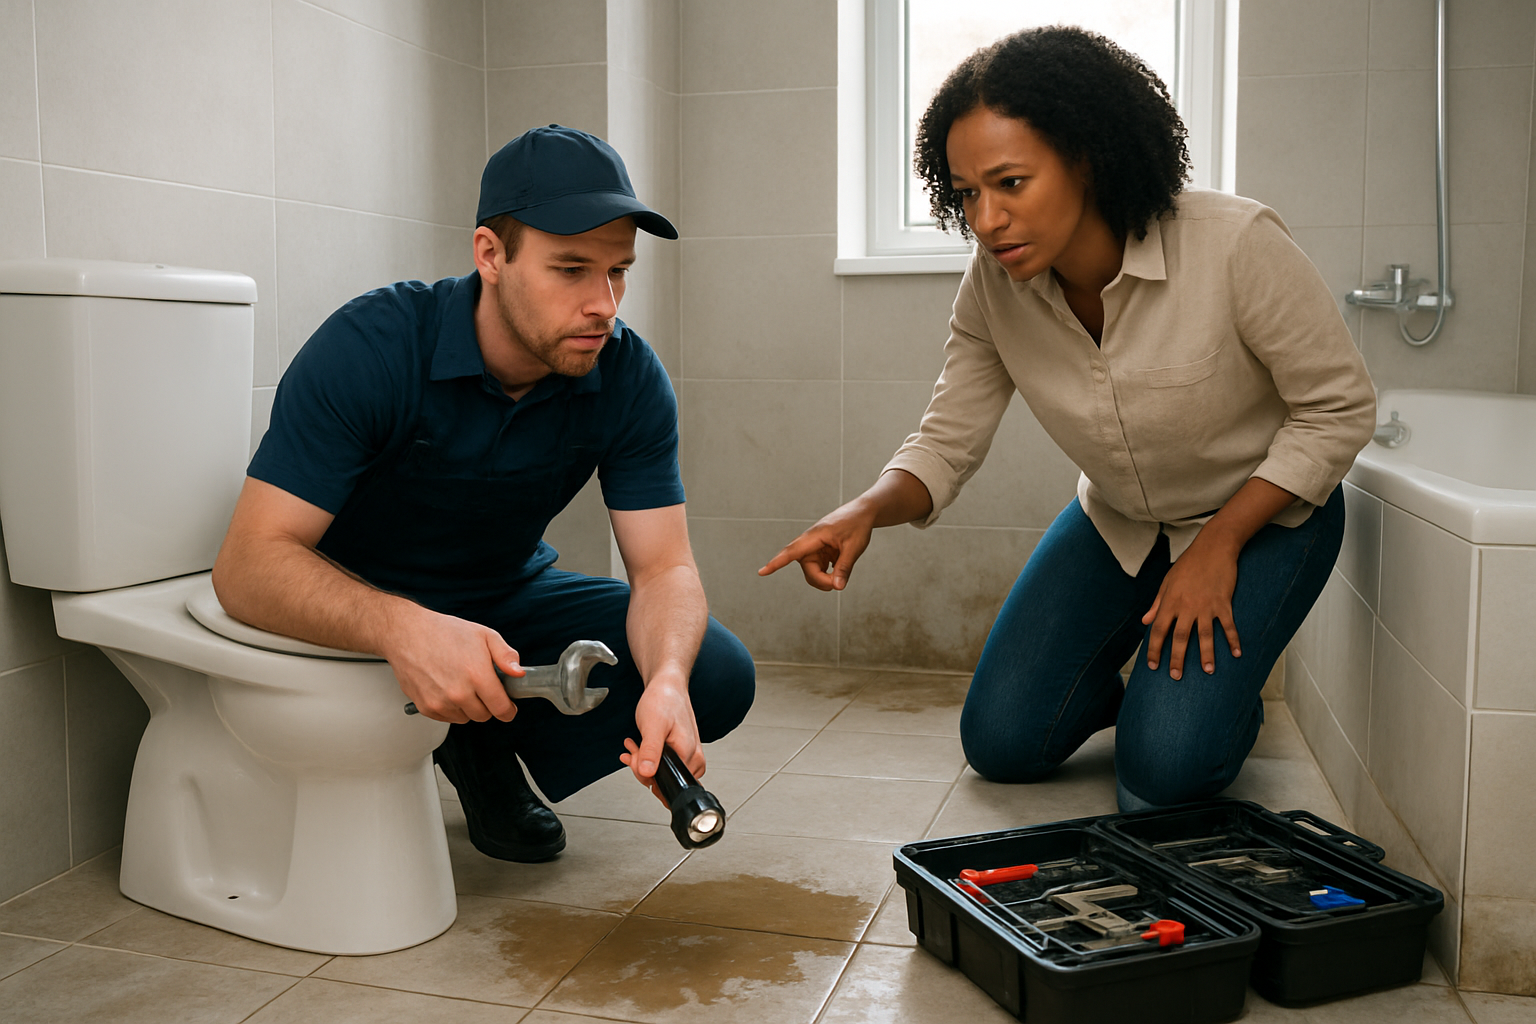
Hidden Pipe Leaks Requiring Wall Access
I’ve encountered countless homeowners who tried to ignore mysterious water spots on their walls or unexplained increases in their water bills. The truth is, when you’re dealing with pipes hidden behind drywall, inside ceiling spaces, or beneath concrete slabs, my DIY toolkit becomes pretty much useless.
My experience has taught me that hidden pipe leaks are sneaky troublemakers. You might notice wet patches appearing on walls, paint bubbling for no apparent reason, or even mold starting to grow in corners where it shouldn’t. I’ve seen cases where families lived with these warning signs for months before realizing they had a major leak destroying their home’s structure.
Professional plumbers bring specialized equipment that I simply can’t access as a homeowner. They use thermal imaging cameras to detect temperature changes behind walls, moisture meters that can pinpoint exactly where water is accumulating, and listening devices that can hear the sound of water moving through pipes. When I tried to locate a leak in my own bathroom wall last year, I ended up cutting three unnecessary holes before admitting I needed expert help.
The wall access part is what really separates professional work from DIY attempts. Plumbers know exactly how to minimize damage when accessing pipes. They understand which walls are load-bearing, where electrical wiring runs, and how to patch everything back together properly. My amateur wall-cutting adventure left me with a bathroom that looked like a construction zone for weeks.
Major Fixture Replacements and Installations
Replacing a toilet, installing a new shower system, or putting in a vanity might seem straightforward, but I’ve learned these projects involve much more than what meets the eye. My first attempt at replacing a toilet taught me that proper sealing, correct pipe connections, and understanding local building codes are absolutely critical.
Professional plumbers handle the complex aspects I never considered. They ensure proper water pressure throughout the system, install fixtures that comply with local regulations, and guarantee that everything connects seamlessly with existing plumbing. When I tried installing a new showerhead with multiple spray settings, I discovered my home’s water pressure couldn’t support the upgrade without additional modifications.
The installation of major fixtures often requires permits, inspections, and adherence to specific building codes. I found out the hard way that my city requires professional installation for certain bathroom fixtures, and my DIY vanity installation actually violated local plumbing codes. Professional plumbers navigate these requirements effortlessly while I would spend weeks researching regulations.
Safety is another crucial factor I underestimated. Working with gas lines for heated fixtures, ensuring proper electrical connections for powered elements, and handling heavy fixtures safely requires training and experience that goes beyond weekend warrior skills.
Extensive Water Damage Restoration Needs
Water damage restoration goes way beyond mopping up puddles and running a few fans. I learned this lesson when a slow leak behind my bathroom vanity created extensive damage that I initially thought I could handle myself. The project quickly escalated beyond my capabilities.
Professional restoration involves understanding how water travels through different building materials, which materials can be saved versus what needs complete replacement, and how to prevent secondary damage like mold growth. My attempt to dry out water-damaged drywall with box fans was completely inadequate compared to the industrial dehumidifiers and specialized drying equipment professionals use.
Mold prevention and remediation require expertise I simply don’t possess. Professionals understand which cleaning products effectively eliminate mold spores, how to test air quality, and when materials are too contaminated to salvage. My surface-level cleaning approach missed hidden moisture that later caused mold problems in areas I thought were completely dry.
For comprehensive solutions that address both immediate repairs and long-term protection, working with experts who offer waterproofing services becomes essential. The Best Water proof Solution- Sumukha Constructions & Designs approach combines professional plumbing repairs with advanced waterproofing techniques that prevent future leakage issues from developing.
Professional restoration also involves insurance coordination, documentation of damage for claims, and ensuring repairs meet insurance company standards. I spent countless hours on phone calls with my insurance company trying to explain my DIY assessment, while professionals handle this communication seamlessly as part of their standard service.

I’ve learned that bathroom water leaks are sneaky troublemakers that start small but can wreck your home if you ignore them. From loose toilet bolts to worn-out shower seals, these common culprits show up through water stains, musty smells, and higher bills. The damage they cause – rotting floors, mold growth, and skyrocketing repair costs – makes catching them early a must.
The good news is that many bathroom leaks are fixable with basic tools and some weekend effort. I can handle simple jobs like tightening connections or replacing worn gaskets myself. But when I’m dealing with major pipe problems or complex plumbing issues, I know it’s time to bring in the pros. Taking action now saves me thousands later – and keeps my bathroom safe and dry for years to come.